Getting Started
Pick a Course to Teach
Choose from over 40 projects. If you are designing a class, curriculum unit, or workshop series use the Scope & Sequence. This document arranges TechnoKids courses by grade level and organizes them into a proposed sequence. Please note, these are recommendations only. Any TechnoKids course can be taught independently or blended with other courses to form a unique learning experience for students.
Suggestions for Course Selection
Grade Level
The Scope & Sequence provides a recommended sequence of instruction. The Primary, Junior, and Intermediate collections organize courses into rows. The top row are the simplest courses, and the bottom row are more challenging. The division can be mapped to grade levels. For example, in the Junior collection, the top row is Grade 3/4, the middle row is Grade 4/5, and the bottom row is Grade 5/6.
Technology Skill
If you intend to target a specific skill, the Scope & Sequence groups many of the courses. For example, in both the Junior and Intermediate collections, the first column is word processing, the second column is spreadsheet/data analysis, the third column is presentation, and the last column is coding. The courses are sequenced from top to bottom and gradually introduce new skills.
Developmentally Appropriate
In the Scope & Sequence the courses build upon one another and increasingly become more complex. Assignments lengthen, students complete a greater amount of work, and tasks require higher order thinking. Moreover, often there is a blend of multiple types of software. If your students are beginners, you can select a course from a lower grade level as these are suggestions only.
Product or Subject
Throughout the TechnoKids curriculum, the same application is used for multiple purposes. For example, students use Slides or PowerPoint to create a book, slide show, presentation, graphic story, timeline, advertisement, interactive map, and online debate. Read the descriptions to pick a digital product you want your students to create or pick one that fits with a subject area you are teaching (e.g., timeline for history, map for geography, or graphic story for language arts).
Topic
Refer to the Scope & Sequence to select a course that integrates with a topic or theme you are already teaching. Many technology projects are open-ended. This provides an opportunity to blend curriculum content with digital learning tools. Alternatively, you can select one to act either as a starting point for a unit or as a culminating project at the end of a unit.
Student Interest
Engage learners by making the learning experience personally relevant. Allow students to choose a course, or if the course is teacher-selected, keep the topic flexible and open-ended.
Software or App
Select a course based on software availability. Refer to the software table in the Scope & Sequence document. It maps the software required for each course.
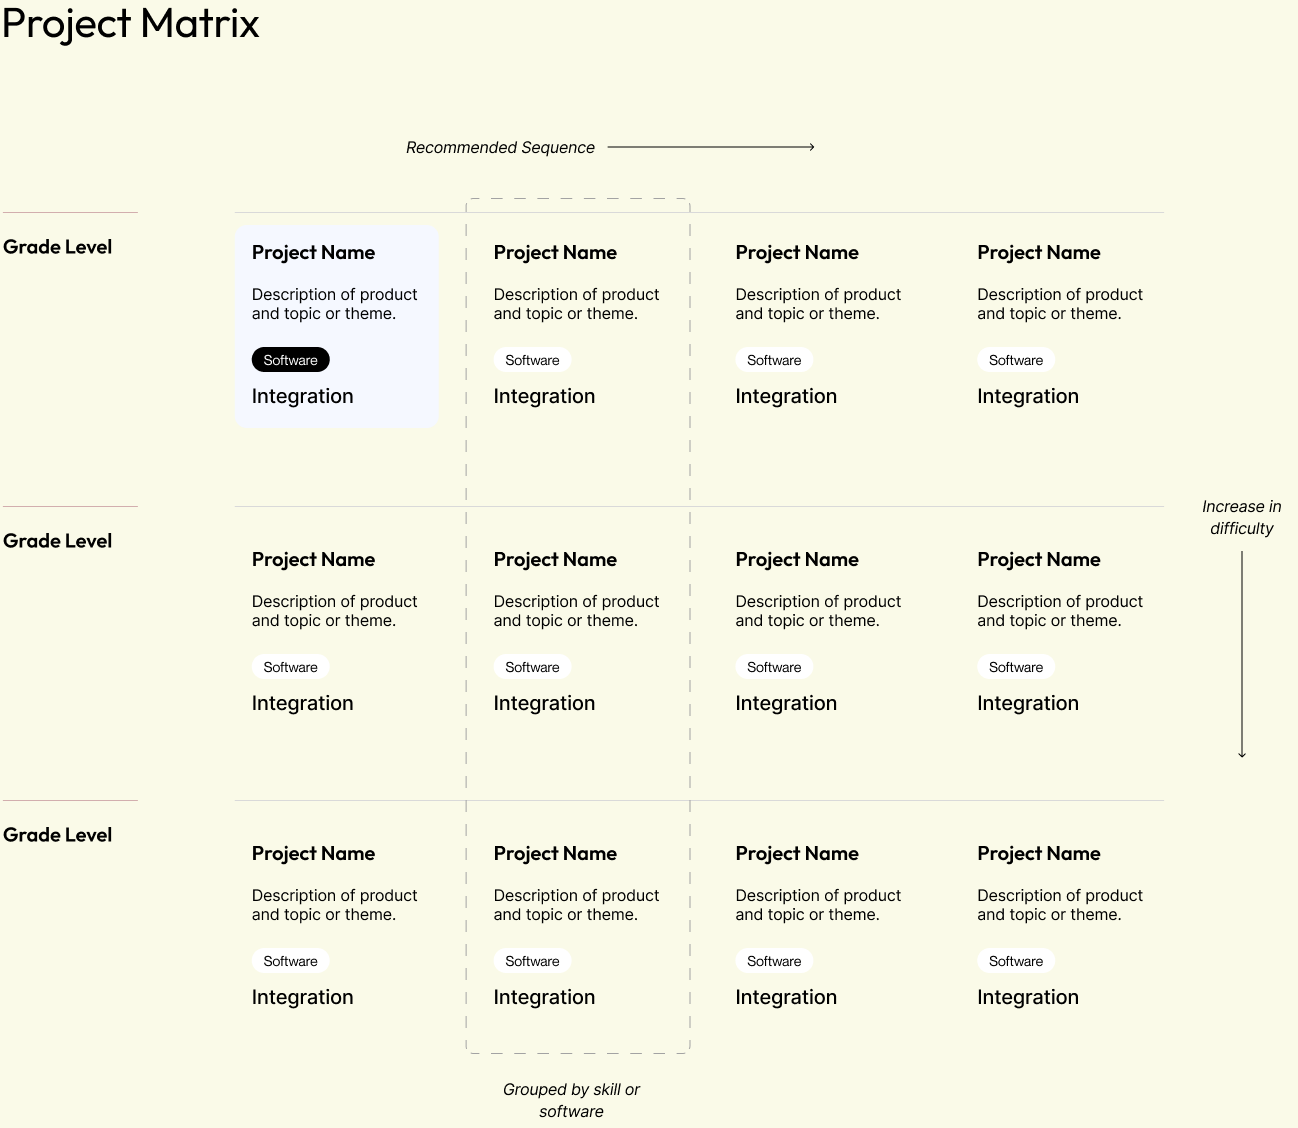
Project Matrix
Lorem ipsum dolor sit amet, consectetur adipiscing elit. Sed consectetur finibus odio vel ornare. Phasellus pulvinar porta sem, sit amet rhoncus felis sagittis et. Duis id est ligula. Quisque euismod venenatis viverra. Vivamus ut dui ipsum. Proin ullamcorper lacinia pretium.
Ideas for Implementation
How to implement TechnoKids courses depends on the curriculum you are teaching, technology skills students need to master, individual interests, and which software you have on devices. To begin, refer to the Scope & Sequence. If you require more detail you may find the TechnoKids Overview document helpful.
When starting something new, limit how many courses you select to teach from the TechnoKids collection. It is a good idea to set realistic goals. You might want to take a multi-year approach as your students gradually build their skills.
School-Wide Initiative
- Year One: Students in Grades 1 and 2, Grades 3, 4, and 5, and Grades 6, 7, and 8 complete the same courses. In this way, you are starting with just 3 different TechnoKids courses. To adjust expectations for different grade levels assign skill reviews and extension activities.
- Year Two: Gradually introduce more TechnoKids courses. Your students in Grades 1, 2, 3, 4, 6, and 7 are now following closely the Project Matrix. For example, Grade 3 students will complete the same course that you taught to Grade 3 students the previous year, but Grade 4 and 5 students will move on to a new course. So you will have one familiar project to repeat, and only 1 new one in each division.
- Year Three: In year three, you can follow the recommended order suggested within the Project Matrix.
Classroom Initiative
- Year One: If you are interested in integrating technology skills into the curriculum, the best approach is to determine the technology area where you feel most confident – typically this is word processing. Start with a TechnoKids course that teaches that skill. Next, read over the course descriptions for your age grouping and determine which theme would "fit" into what you are already teaching and what technology skill requires emphasis. Select the course that suits your needs. Try to teach two TechnoKids courses n your first year.
- Year Two: Select a TechnoKids course that emphasizes a technology skill in which you are less proficient, such as spreadsheets or coding. You can learn along with your students.
- Year Three: By this time, you will be an expert at selecting and teaching using the TechnoKids courses. Have fun!