
In my previous post, I listed the steps to create a zoom to a slide using the Zoom Tool in PowerPoint 2016. Don’t confuse this, as I did at first, with the zoom slider in all Microsoft programs that lets you change the magnification of your window. This is entirely different. The Zoom Tool automatically creates both a thumbnail of a selected slide and a link to that slide. Put these thumbnails on a title slide or any other slide to quickly and easily make buttons to link to slides in a presentation.
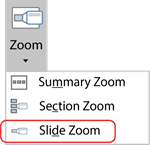
Slide Zoom
To make a Slide Zoom in a shorter presentation, see Zoom Tool in PowerPoint for Awesome Presentations Part 1.
Section Zoom
For longer presentations with many slides, you can organize the show into sections. First, group slides into categories and make separate sections. Then create a Section Zoom to link to each section. In this way, you can adjust the presentation for different audiences, easily navigate to different sections depending on viewer questions, or just go to specific sections to modify the presentation. Section Zooms are ideal because, after viewing each section, the user is taken back to the slide with all the Section Zooms.
Add a Section
- Decide where you want to create a section. Right click between two slide thumbnails.
- Click Add Section.
- In the Rename Section box, replace Untitled Section with a name for the section. Click Rename.
- Continue to divide the slide show into sections, renaming each section.
View the Sections
- Click the View tab, and pick Slide Sorter.
- View thumbnails of all of your slides organized into sections.
Create a Section Zoom
- In Normal View, select the slide where you want to create the Section Zoom, most likely the title or a table of contents slide.
- Click the Insert tab and pick Zoom.
- Select Section Zoom.
- In the Insert Section Zoom box, check each section to which you want to create a link. Click Insert.

Format Section Zooms (Optional)
If you want to change the appearance of the Section Zoom thumbnail, go to the Zoom Tools Format tab. Use the preset Zoom Styles or make your own style using the Zoom Border, Zoom Effects, and Zoom Background tools. You can even right click a zoom image and pick Change Image to replace it with an image or icon of your choice. Read my previous post about the Zoom Tool to see a listing of the Zoom Tools.
Summary Zoom
Whether you have sections or not, this option creates a new slide. It places zooms of all of the sections on the new slide, similar to a table of contents or landing page. You can also choose to have all the slides or just some of the sections on this new slide.
If the presentation has animations and timings are set to advance slides automatically, a summary zoom will play each section and then automatically go on to the next section that you’ve picked. This is a great option for a kiosk type of display.
- From the Insert tab, pick Zoom.
- Select Summary Zoom.
- The Insert Summary Zoom box opens with each section preselected. (If you have no sections, you will have to choose which slides you want to zoom.) You can keep all the selected sections or you can choose to just pick the sections you want. Be sure to keep the checkmark on Keep unused sections in your presentation. Click Insert.
- A new slide and section named Summary Section is created with zooms to each selected section. Resize or format the zoom thumbnails as desired using the Zoom Tools Format tab.
TechnoMap PowerPoint Lesson Plans

TechnoMap is a technology project that teaches map skills using PowerPoint. Students create an interactive map of a location, connecting places with events, issues, or people. In this project, students use Zoom to link markers on a map to slides explaining the significance of each area. Learn more about TechnoMap here.