
This blog explains the seven steps to producing a Photostory about leadership. A Photostory shares a message using only images. The individual images are sequenced together to produce a video. A Photostory can be time consuming to complete. You should allocate roughly eight classes.
Why a Leadership Photostory?
This year the school launched a leadership initiative based on the Seven Habits of Highly Effective People by Stephen Covey. To help students learn more about the habits the Grade 2 students created a Photostory. In each photo, a student held a sign they had created to promote leadership. These images were sequenced into a video that played on the television screen in the front foyer of the school.

The goal of the project was to have students gain a deeper understanding of the 7 habits while applying effective leadership skills. The diversity in activities made it possible to interweave each of the seven habits into learning. The 7 Habits of Highly Effective Students are:
- Be proactive
- Begin with the end in mind
- Put first things first
- Think win-win
- Seek first to understand, then be understood
- Synergize
- Sharpen the saw
How to Create a Photostory
Creating a Photostory is a student-driven activity. Students collaborate to learn how to use technology, plan the content of the Photostory, create signs, take photos, select the best shot, produce the final video, and acknowledge the contribution of others. If time is limited, you can make the activity more teacher-directed, however that will reduce some of the learning. Here are the seven steps:
- Photography Practice
- Planning Meeting
- Leadership Sign Creation
- Photo Shoot
- Select Best Shot
- Produce Photostory
- Share PhotoStories about Leadership
Step 1: Photography Practice (1 class)
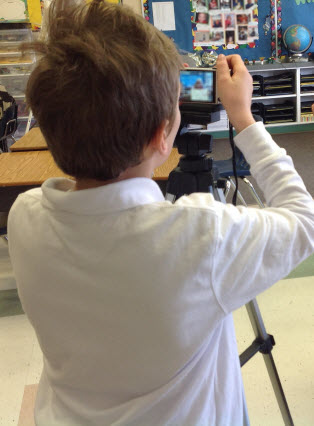
You need to teach your students how to responsibly handle camera equipment and capture photographs. Here are some lesson suggestions:
- Tripods: To ensure the safety of the school’s camera equipment, inexpensive tripods can be purchased from a local discount store (for only $10). Often inexpensive tripods are not very tall, which makes them the perfect height to mount cameras for use by Grade 2 students. Tripods also add a professional touch to the assignment, encouraging students to recognize the value and significance of the task.
- Recruit Volunteers: Students will need extra support during this practice activity. Ask a parent to assist during this lesson.
- Team Up: Students need to be divided into teams. Now is a good time to provide tips for collaboration. Observe how group members interact. If necessary make adjustments now, as teams will be working together for the remainder of the project.
- Student Driven: Begin the lesson by modelling how to use the cameras. Be clear on your expectations for proper care. Now step back. Give your students a chance to become photographers. Encourage students to direct models (other team members) on how to pose. After several photos are taken, students should switch roles.
- Celebrate: After class (during a break or at the end of day), transfer images from each camera into a folder. Show students the collection of photos. Everyone will enjoy seeing pictures of themselves and their friends.
Step 2: Planning Meeting (2 classes)

Next, schedule time for students to reassemble into teams to plan the content of their leadership message. There are many decisions to make including:
- Which of the seven habits should we choose for our topic?
- What unique message can we each create related to the leadership topic?
- Where is the best location to shoot photos of the leadership signs?
- Are any props or clothing required to help communicate the leadership message?
TIP: Parent Letter
To help students prepare I sent a letter home informing parents about the Photostory. A request was made to remind students about the props they may need to bring in for the photo shoot. For example, the group that had selected synergize had decided to wear sport team jerseys and bring in trophies they had won. You may also want to send home a parent letter.
Step 3: Leadership Sign Creation (2 classes)

Each student needs to create a sign with their leadership message. Prior to beginning, have a discussion about design with an emphasis placed on making letters that are easy to read. Here are a few suggestions:
- Gather Materials: Decide if your students are going to paint, draw, or use the computer to create their signs. Once a decision has been made be sure to gather the necessary materials or schedule computer lab time.
- Check Spelling: You do not want any spelling mistakes in the signs. Be sure to proofread each student’s sign before they apply paint, start to color, or print.
Step 4: Photo Shoot (1 class)

Students reassemble into their teams to take photographs of their leadership signs. Taking all the photos in one class can be a challenge. Read these helpful tips:
- Recruit Volunteers: Have parent volunteers assigned to each group. Since this is a leadership based activity, the majority of decision making and time management strategies should be student-driven. However, having an adult available to assist group members is a good idea. You may want the parent volunteer to carry the equipment to the photo-shoot location to make sure that it is secure during transit. Please note, photos should be taken by student-photographers.
- Allow Preparation Time: Students may need time to change their clothing or gather props. Allocate time prior to the start of the photo shoot. This will make sure that everyone is prepared.
- Take More Than One Shot: Have student-photographers take three to four photos of each model. This will allow the person to select the image they like the best.
- Transfer Photographs to a Shared Folder: Each group needs access to their photos in the following class. Copy the photos from each camera’s memory stick into a group folder that students can easily access.
Step 5: Select Best Shot (1 class)
Although digital cameras allow an image to be previewed, often the screen is too small to determine the quality of the shot. Students need to select the best shot. Either individually or as a group have students view the photos taken during the photo shoot. They can either rename the shot they want to use for the PhotoStory, delete all unwanted shots, or copy the “best shot” to another folder. The shot should:
- Have a Sign that is Easy to Read: The leadership message should be clear. No letters should be covered.
- Include a Clear Shot of the Model: The face of the student-model holding the sign should be viewable. It is best if they have a happy expression.
- Have a Neutral Background: The background should not attract attention. The focus should be on the sign.
Step 6: Produce Photostory (1 class)
Students can use a range of software to sequence images together to produce a photostory. MovieMaker and Photo Story are two options. For this leadership activity Photo Story was used. This software was selected because the computers were still using Windows XP (NOTE: Although originally designed for Windows XP, Photo Story does work on both Windows 7 and Windows 8 computers) AND because the software has a Motion option that makes it easy to zoom in or out of the leadership message.
How to use Photo Story:
- Open Photo Story.
- Click Begin a new story. Click Next.
- Click Import Pictures. Select the pictures for the Photo Story. Click OK. Click Next.
- Click Next again.
- Click the first picture. Click Customize Motion.
- Click the Specify start and end position of motion checkbox. Resize the box to go around the leadership sign in either the Start or End position.
- Set the duration to 8.0 seconds.

- Click Save.
Step 7: Share PhotoStories about Leadership (1 class)
Have students watch each other’s videos about leadership. You may want to discuss the leadership skills required to create the photostory. For example:
- What strategies did students use to stay on-task
- How did students stay organized?
- How did working as a team make the activity easier?
This activity took several weeks to complete. When the videos were complete, a master file was created and played for all students in the school on the television screens in the front foyer.